 Pin
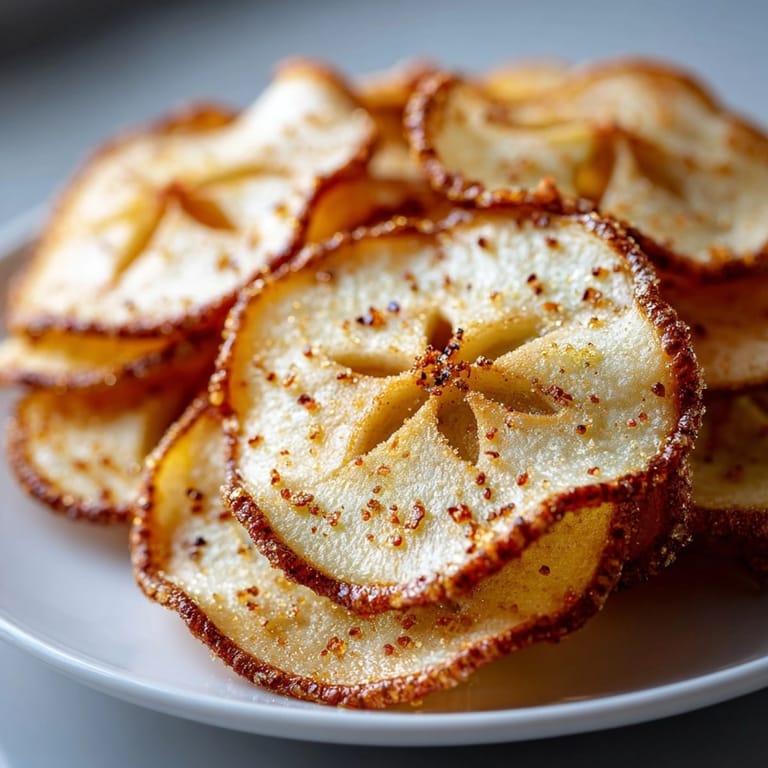
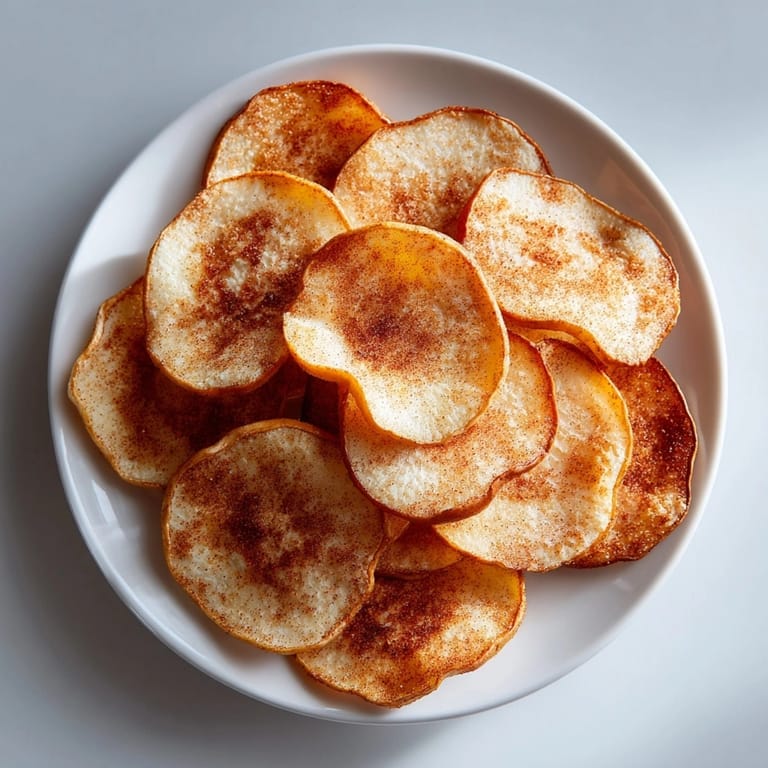
Pin This naturally sweet baked cinnamon sugar pear chips recipe transforms ordinary pears into crispy, guilt-free treats that satisfy your snack cravings without the guilt. Each delicate chip delivers the perfect balance of fruity sweetness and warm cinnamon spice, creating an irresistible combination that both kids and adults adore.
I first made these pear chips when looking for a healthy alternative to potato chips for my daughter's lunchbox. Now they've become our weekend baking tradition, with everyone gathering in the kitchen to sprinkle the cinnamon sugar while the sweet aroma fills our home.
Ingredients
- Pears: 3 ripe but firm pears like Bosc or Anjou provide the perfect texture. Bosc pears work exceptionally well as they have a firmer flesh that crisps beautifully when baked. Look for pears that yield slightly to pressure but aren't mushy.
- Sugar: 2 tablespoons granulated sugar creates just enough sweetness. I prefer using organic cane sugar for its subtle molasses notes that complement the pears beautifully.
- Cinnamon: 1 teaspoon ground cinnamon adds warm spice notes. Freshly ground cinnamon makes a noticeable difference in flavor intensity, so consider grinding your own from cinnamon sticks if possible.
- Lemon juice: 1 teaspoon optional but helps prevent browning and adds a subtle brightness. Always use fresh lemon juice rather than bottled for the best flavor.
Tired of Takeout? 🥡
Get 10 meals you can make faster than delivery arrives. Seriously.
One email. No spam. Unsubscribe anytime.
Instructions
- Prepare the oven and baking sheets:
- Preheat your oven to 110°C (230°F). This low temperature is crucial for slowly dehydrating the pears without burning them. Line two large baking sheets with parchment paper, ensuring they are completely flat to allow for even baking. The parchment prevents sticking and makes cleanup much easier.
- Prepare the pears:
- Wash and thoroughly dry the pears, then core them carefully. Using a mandoline or very sharp knife, slice the pears as thinly as possible, aiming for about 2mm thickness. Consistency is key here the more uniform your slices, the more evenly they will crisp up. If using a knife, take your time and work slowly for the best results. If desired, brush the slices lightly with lemon juice to prevent oxidation and browning.
- Arrange the pear slices:
- Place the pear slices in a single layer on the prepared baking sheets, making sure they do not overlap or touch. Crowding the pan will cause the pears to steam rather than crisp. Leave a small amount of space between each slice to allow for proper air circulation during baking.
- Season with cinnamon sugar:
- In a small bowl, thoroughly mix the granulated sugar and cinnamon until well combined. Using your fingers or a small sieve, sprinkle the mixture evenly over the pear slices. Try to distribute it as evenly as possible for consistent flavor in every bite.
- First baking phase:
- Place the baking sheets in the preheated oven and bake for 1 hour. The low temperature allows the moisture to slowly evaporate from the pears without burning the sugar. During this time, the pears will begin to shrink and dry out.
- Flip and continue baking:
- After the first hour, remove the baking sheets and carefully flip each pear slice using a thin spatula or your fingers. This ensures even drying and crisping on both sides. Return the sheets to the oven and continue baking for another 30 to 45 minutes, checking occasionally to prevent burning.
- Cool and store:
- Once the pear chips are golden and beginning to crisp around the edges, remove them from the oven. Let them cool completely on the baking sheets. They will continue to crisp up significantly as they cool, so dont worry if they still seem slightly pliable when first removed from the oven. Once fully cooled, store in an airtight container for up to one week.
The cinnamon is truly the secret ingredient in this recipe. I once made these chips without it, and while they were good, they lacked that special warmth that makes them irresistible. My grandmother always said cinnamon brings out the natural sweetness in fruits, and these chips prove her absolutely right. The way the spice caramelizes slightly with the sugar creates little pockets of flavor that burst with each crispy bite.
Choosing the Right Pears
The variety of pear you select makes a significant difference in the final texture and flavor of your chips. Bosc pears are my top recommendation due to their dense flesh and lower water content, which helps them crisp up more effectively. Anjou pears also work well and offer a slightly different flavor profile. Bartlett pears can be used but tend to be juicier, requiring additional baking time. Avoid overly ripe pears as they contain too much moisture and will struggle to crisp properly. The ideal pear should feel firm with just a slight give when gently squeezed.
Perfect Thickness Tips
Achieving the right thickness is perhaps the most critical factor for successful pear chips. Too thick, and they'll never fully crisp; too thin, and they'll burn before drying properly. A mandoline slicer set to 2mm creates the ideal thickness consistently. If using a knife, practice on a few slices until you get the feel for the right thickness. Hold the pear slices up to the light they should be slightly translucent if they're the correct thickness. Remember that uniform thickness means uniform cooking, so take your time with this step for the best results.
Creative Flavor Variations
While the classic cinnamon sugar coating is delicious, these pear chips can be customized in numerous ways. For a more complex spice profile, add a pinch of nutmeg, cardamom, or ginger to the cinnamon sugar mixture. For an adult version, try adding a tiny pinch of cayenne for a sweet heat combination. Vanilla sugar can replace regular sugar for more an aromatic profile. For a savory twist, skip the sugar entirely and dust with sea salt and rosemary these make excellent accompaniments to cheese plates. During the holidays, incorporating a pinch of cloves and allspice creates a festive flavor reminiscent of mulled cider.
Serving Suggestions
These delicate pear chips shine in so many ways beyond simple snacking. Use them as an elegant garnish for vanilla ice cream or panna cotta. Crumble them over yogurt parfaits for a crunchy element that's healthier than granola. They make beautiful decorations on cakes or cupcakes, especially those with cream cheese frosting. Include them on cheese boards alongside aged cheddar or blue cheese for a sweet counterpoint. Crush them slightly and use as a topping for baked oatmeal or overnight oats. They also make a gorgeous garnish floating atop fall cocktails or hot apple cider.
Troubleshooting Tips
Not crispy enough Let the chips cool completely before determining if they need more time. If still not crisp after cooling, return to a 200°F oven for 15 minute intervals until desired crispness is achieved. Burning before crisping Your oven may run hot. Reduce temperature by 10°F and extend baking time. Chips become soggy after storage They likely retained some moisture. Store with a food-safe silica packet or reheat briefly in a 200°F oven to restore crispness.
Success Stories
My neighbor Janet was skeptical when I first offered her these pear chips, assuming they'd taste like diet food. After trying them, she immediately asked for the recipe and now makes them weekly for her grandchildren, who prefer them to commercial fruit snacks. Another friend incorporated them into her wedding dessert table as decorative elements on the cake and alongside the cheese display. The delicate appearance and natural sweetness made them a conversation piece among the guests. Even my brother, who typically avoids healthy alternatives to snack foods, keeps a jar of these in his pantry for when sweet cravings strike.
 Pin
Pin Enjoy these delicious and healthy homemade pear chips, a perfect snack any time of day!
Recipe Q&A
- → How thin should I slice the pears?
Slice pears about 2 mm thick for best crispiness. Use a mandoline or a sharp knife for even slices.
- → Why brush slices with lemon juice?
Lemon juice helps prevent the pears from browning during baking, keeping them looking fresh and bright.
- → Can I make these without sugar?
Yes, you can omit sugar or use coconut sugar for a refined sugar-free option. The chips will remain tasty and naturally sweet.
- → How do I store pear chips?
Allow chips to cool completely, then store them in an airtight container to keep them crisp for up to one week.
- → What can I serve with these chips?
Try them as a snack, paired with yogurt, sprinkled over oatmeal, or used as an elegant dessert garnish.
- → Can I add other spices?
Absolutely! A pinch of nutmeg or cardamom in the cinnamon sugar enhances the flavor profile.