 Pin
Pin I discovered egg crepes by accident one rushed Tuesday morning when I'd grabbed eggs instead of flour. Rather than waste them, I tossed everything into the blender with a splash of milk and watched it transform into this ethereal, cloud-like batter. That first crepe came out impossibly thin and delicate, nothing like the dense pancakes I'd been making for years. Now it's my go-to when I want something that feels fancy but takes barely ten minutes from fridge to plate.
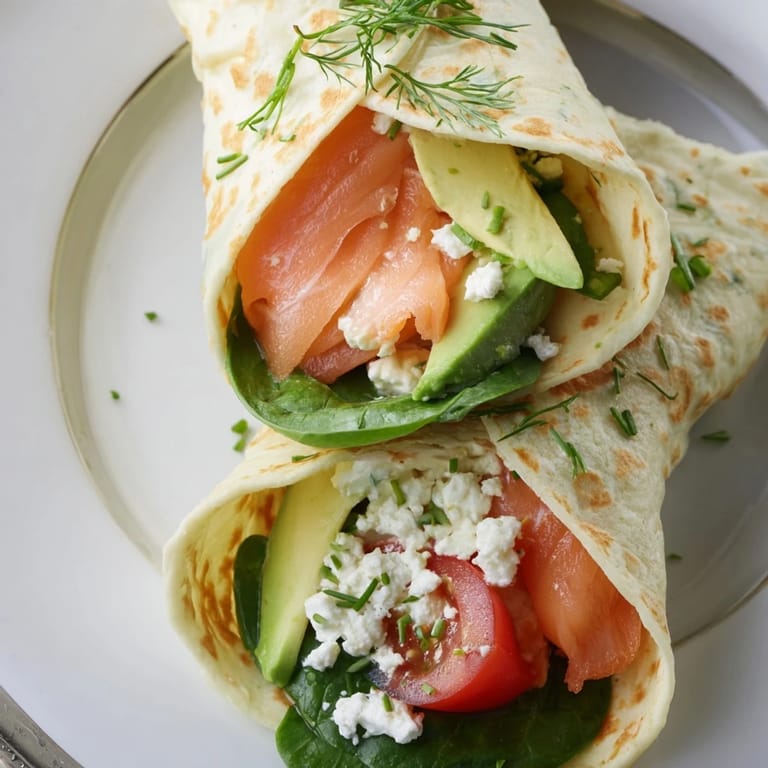
I made these for my sister when she was visiting and had just started avoiding gluten. The relief on her face when I told her they were egg-based was worth the whole experiment—she'd been tired of feeling left out at breakfast. She wrapped hers with smoked salmon and avocado, and suddenly we were both eating like we were at a proper brunch instead of standing in my kitchen in pajamas.
Ingredients
- Eggs (4 large): The star of the show—they create structure and protein without any flour, so use the freshest ones you have because you'll taste them.
- Water or milk (2 tablespoons): This loosens the batter to a pourable consistency; I've found non-dairy milk works just as well and adds a subtle richness.
- Salt and black pepper (pinches): These tiny amounts wake up the egg flavor in ways you wouldn't expect until you taste the difference.
- Olive oil or butter (1 teaspoon): For cooking—just enough to prevent sticking without making the crepe greasy.
- Fillings (your choice): Spinach, smoked salmon, feta, tomato, avocado, or fresh herbs—pick what sounds good right now.
Tired of Takeout? 🥡
Get 10 meals you can make faster than delivery arrives. Seriously.
One email. No spam. Unsubscribe anytime.
Instructions
- Blend everything until it's cloud-like:
- Crack your eggs into the blender with the liquid, salt, and pepper, then blend on high for 30 to 45 seconds until the mixture looks pale and frothy. You'll know it's ready when it barely sloshes and smells airy rather than eggy.
- Get your pan hot and slicked:
- Heat a non-stick skillet over medium heat for about a minute, then brush it lightly with oil or butter. The pan should be hot enough that a drop of batter sizzles immediately, but not smoking.
- Pour and tilt like you're creating art:
- Pour half the batter into the center of the pan and immediately start tilting in all directions so it spreads into a thin, lacy layer. It should cover the bottom almost completely within a few seconds—don't overthink it if it's not perfect.
- Cook until the edges release:
- After 1 to 2 minutes, run your spatula around the edges and gently lift one side to peek—the bottom should be pale golden and the top mostly set. Flip quickly and cook the other side for just 30 seconds, then slide onto a plate.
- Make your second crepe:
- Pour the remaining batter into the same hot pan and repeat the whole process. You've got this rhythm now.
- Fill and fold with intention:
- Lay your crepe on a plate, arrange your chosen fillings in a line down the center, then fold or roll it gently. Serve while it's still warm and slightly steaming.
 Pin
Pin I'll never forget when my friend Marcus tried one with berry filling and honey drizzled on top. He went quiet for a moment, then said, "This tastes like what brunch should taste like." That's when I realized these crepes had quietly become the thing I made when I wanted someone to feel cared for.
Sweet vs. Savory: Two Worlds from One Crepe
The beauty of this crepe is its neutrality—the egg base is genuinely blank canvas. For savory, I pile mine with fresh spinach, a few slices of tomato, and good smoked salmon if I have it; for sweet mornings, I reach for berries, a dollop of yogurt, and just enough honey to pool slightly when it hits the warm crepe. The technique never changes, but the meal feels completely different, which is why I make two and get to decide at the last second which direction I'm hungry.
The Physics of Getting It Thin
The hardest part isn't the cooking—it's fighting the urge to thicken the batter to make it easier. Thin is the goal, and thin means that batter has to be pourable almost like cream. When I first started, I kept thinking I'd made a mistake because it looked so loose, but the blender does something magical: all those air bubbles create tiny pockets that puff up in the heat, making the crepe light instead of dense. Once I trusted the process, everything changed.
Timing and Temperature: The Quiet Skills
Medium heat is your friend here—too high and the bottom burns before the top sets, too low and you're waiting forever while the crepe sticks. I've learned to set my pan and give it a full minute to get genuinely hot before I pour, and I can feel when it's right by holding my hand just above the surface. There's also something peaceful about the rhythm: pour, tilt, wait, flip, cook, plate. It's almost meditative if you're not rushing.
- If your first crepe tears badly, just add it to your bowl of fillings and make a scrambled situation—still tastes great.
- Keep the finished crepes on a warm plate so they stay pliable while you're filling them.
- These are best eaten immediately, but leftover crepes can be wrapped in foil and gently warmed the next morning.
 Pin
Pin These crepes remind me that cooking doesn't always have to be complicated to feel special. Every time I make them, someone asks for the recipe, and I love that a ten-minute breakfast can turn into something memorable.
Recipe Q&A
- → How do I achieve frothy eggs for the crepes?
Blend eggs with a small amount of water or milk on high speed for about 30-45 seconds until very frothy and light.
- → What is the best way to cook these egg crepes?
Heat a non-stick skillet over medium heat, lightly coat with oil or butter, then pour a thin layer of the egg mix, cooking until edges lift before flipping briefly.
- → Can I customize the fillings?
Absolutely. Fillings can range from savory choices like spinach, smoked salmon, and cheese to sweet options such as berries and yogurt.
- → Are these wraps suitable for special diets?
Yes, these crepes can fit gluten-free, low-carb, and dairy-free diets depending on the fillings selected.
- → How should I store leftover crepes and fillings?
Keep crepes and fillings refrigerated in separate containers and assemble wraps just before serving to maintain freshness.