 Pin
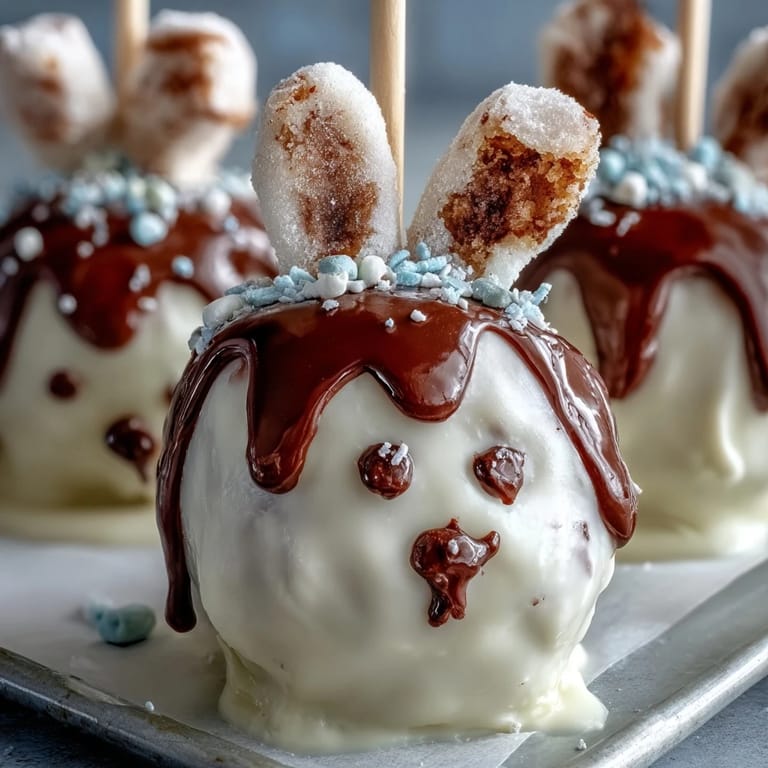
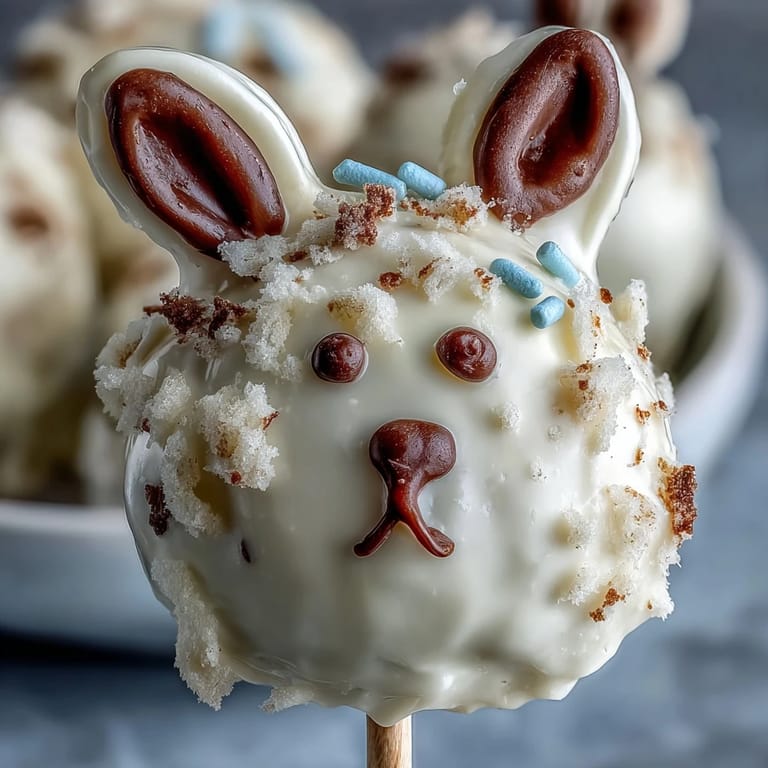
Pin My sister called me in a panic three days before Easter, insisting we needed something special for the brunch that didn't require a full cake. I was standing at my kitchen counter, coffee in hand, when she mentioned those trendy cake pops she'd seen online—and suddenly I was imagining little bunny faces peeking out from a dessert tray. What started as a quick solution became an obsession with tiny ears and frosting details that had me laughing at myself by midnight.
The real magic happened when I made these for my nephew's school party and watched a quiet kid in the corner suddenly perk up at the sight of them on the table. He came over just to ask if the whiskers were real, and I realized that sometimes food is really about creating those small moments of wonder that people remember.
Ingredients
- Vanilla or funfetti cake mix (1 box, about 400 g): The base that holds everything together; I've learned that funfetti adds a subtle sweetness that needs less frosting adjustment.
- Eggs, oil, water as specified on box: Follow the box directions exactly because this is your structure—don't get creative here like I did once.
- Cream cheese (100 g, softened): This tanginess balances the sweetness and keeps the filling from feeling cloying; soften it properly or you'll spend twenty minutes beating.
- Unsalted butter (60 g, softened): The partner to cream cheese that makes everything bind smoothly without overpowering the flavor.
- Powdered sugar (120 g): Sift it first if you want zero lumps, though I'll admit I've skipped this step when I'm in a hurry.
- Vanilla extract (1/2 tsp): Just enough to make people wonder what the secret ingredient is.
- White chocolate melting wafers (400 g): These are gentler than chopped chocolate and melt more evenly; cheap wafers work fine for coating.
- Lollipop sticks (24): The wooden kind holds better than plastic, and having a few extras prevents meltdowns when one snaps.
- Pink candy melts or colored chocolate: For the ears and nose that make them recognizably bunnies rather than just blobs.
- Edible black food marker or melted dark chocolate: The marker is less fussy than melted chocolate, though melted chocolate photographs better.
- Mini marshmallows (optional): These fluffy little tails are what transform them from fancy to impossibly adorable.
- Rainbow sprinkles or pastel confetti (optional): A finishing touch that makes them feel festive without being necessary.
Tired of Takeout? 🥡
Get 10 meals you can make faster than delivery arrives. Seriously.
One email. No spam. Unsubscribe anytime.
Instructions
- Bake and cool your cake base:
- Follow the box directions, and this is crucial—let it cool completely on a wire rack before touching it. I once rushed this step and the frosting melted everywhere, so patience here saves frustration later.
- Create the frosting:
- Beat your softened cream cheese and butter together until creamy, then add powdered sugar gradually and vanilla until it's smooth and fluffy. It should feel light, almost cloud-like, when you lift the mixer beaters out.
- Mix cake and frosting together:
- Crumble the cooled cake into large pieces, then add frosting in small batches while mixing gently with your hands or a spatula. You're looking for a texture that holds together but doesn't feel dense or sticky—it should feel like dense cookie dough that's ready to shape.
- Roll and shape your bunny heads:
- Divide the mixture into 24 pieces and roll each into a smooth ball, then gently press and shape each one into a slight oval that resembles a bunny head. Smooth out any cracks as you go because these little imperfections matter when you're decorating faces.
- Chill your cake balls:
- Spread them on a parchment-lined baking sheet and freeze for exactly 20 minutes—this firms them up so they won't fall apart during dipping. Set a timer because I've forgotten and come back to mushy disasters more than once.
- Melt your white chocolate coating:
- Use the microwave method in 30-second bursts, stirring between each one, until it's smooth and pourable. If it gets too thick while you're working, microwave it for another 10 seconds rather than adding water.
- Secure the lollipop sticks:
- Dip the tip of each stick in melted chocolate, then push it halfway into the center of each cake ball so it holds firm. This step feels fiddly but it's what keeps your whole creation from tumbling off mid-decoration.
- Dip into the white chocolate:
- Working one at a time, gently twist each cake pop into the melted white chocolate, then slowly pull it back out, letting the excess drip off for a few seconds. Place it upright in your styrofoam block or stand immediately and resist the urge to touch it while it sets.
- Attach the bunny ears and tail:
- While the white coating is still slightly tacky, press pink ear shapes onto the top of the head and a marshmallow to the back for a tail. If the coating has hardened, dab the back of each decoration with a tiny bit of fresh melted chocolate to make it stick.
- Add the face details:
- Once everything is fully set, use an edible marker to draw eyes and whiskers, or pipe melted dark chocolate for a more elegant look. Add a pink nose and any sprinkles or confetti you want while standing back occasionally to admire your tiny bunny army.
- Let them fully cure:
- Give them at least an hour at room temperature before serving, though overnight in the refrigerator actually makes them taste better and easier to transport.
 Pin
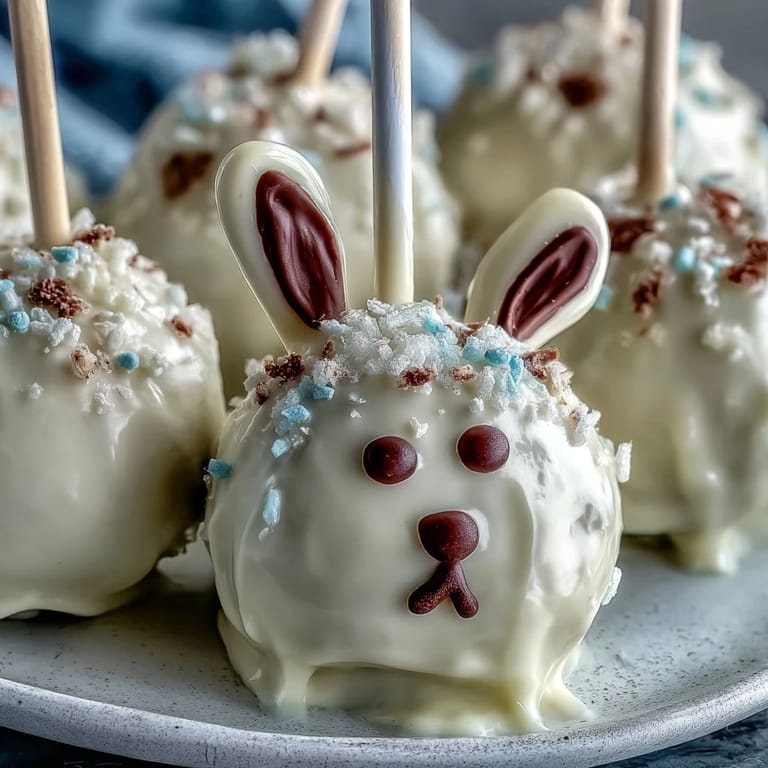
Pin There's something about handing someone a tiny cake pop bunny and watching their face light up that makes all the careful decorating feel worthwhile. These aren't just desserts; they're little edible gifts that say you cared enough to make something intricate and joyful.
Prep Work Strategy
I've found that making these in stages actually works better than trying to do everything at once. Bake your cake the day before, make the frosting and cake ball mixture the morning of, chill them, then do all your decorating in one focused session where everything's ready to go. This approach keeps your kitchen from feeling like you're juggling while the chocolate hardens.
Decorating Without Stress
The hardest part for most people is worrying that the decorations won't look perfect, but honestly, slightly wonky ears and asymmetrical faces are what make them charming instead of factory-made looking. I keep my edible marker nearby and stay loose with the design—bunny faces have personality, not uniformity, and that's the whole point.
Storage and Serving Secrets
These keep beautifully in an airtight container in the refrigerator for up to four days, which makes them perfect for making ahead of Easter morning. Pull them out about 15 minutes before serving so they're not too cold and hard to bite into, and they genuinely taste better after a day as the flavors meld together.
- Transport them in a shallow container with parchment paper between layers so they don't bump into each other and lose their decorations.
- If one breaks while you're decorating, eat it as a quality-control snack and keep moving forward without guilt.
- Make at least two extra because people will ask for seconds and you'll want to keep one for yourself to enjoy later.
 Pin
Pin Making Easter bunny cake pops is the kind of project that feels fancy but genuinely isn't, which is exactly why people keep asking you to make them year after year. They're proof that thoughtfulness in the kitchen doesn't require complicated techniques, just patience and a little creative spark.
Recipe Q&A
- → How do I shape the cake pops into bunnies?
Roll the cake mixture into balls, then gently shape each into a slight oval for the bunny head before chilling.
- → What is the best way to attach the lollipop sticks?
Dip the tip of each stick into melted white chocolate before inserting halfway into the cake ball to secure it firmly.
- → Can I substitute the white chocolate coating?
Yes, you can use candy melts or tempered chocolate of your choice, but white chocolate provides the classic creamy look.
- → How to make the pink bunny ears stand out?
Cut or pipe colored candy melts into ear shapes and attach them while the coating is still wet for best adhesion.
- → What is the best way to store the finished cake pops?
Store in an airtight container in the refrigerator for up to four days to maintain freshness.
- → Are these suitable for a vegetarian diet?
Yes, the ingredients used align with vegetarian dietary preferences.