Pin
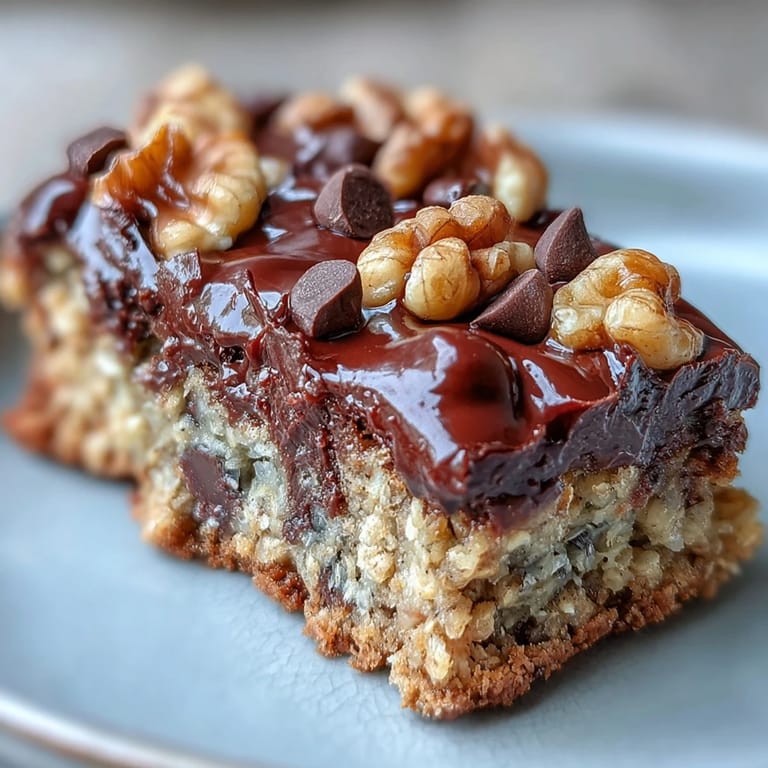
Pin My gym buddy Sarah showed up to our morning workout with these bars one Tuesday, and I've been hooked ever since. She explained they tasted like the Chunky Monkey smoothie bowls we'd grab after class but in actual food form—no blender required. The first bite hit me with that perfect banana-chocolate combo, and I realized she'd cracked the code on making something that felt indulgent but actually fueled your day. Now I batch these every Sunday evening while listening to podcasts, and they've become my non-negotiable grab-and-go breakfast.
I brought a batch to my sister's house when her new baby came home, and watching her eat one with her free hand while holding her daughter made me realize these bars had become my love language. She texted me the next day asking for the recipe, which felt like the ultimate compliment since she's usually skeptical of my cooking experiments.
Ingredients
- Ripe bananas (2 large, mashed): The star player here—use ones that are almost too soft with brown speckles, because that sweetness and moisture does the heavy lifting so you don't need excess sugar.
- Unsweetened applesauce (1/2 cup): This keeps things moist without adding refined sugar, and honestly, nobody will taste it because the banana takes all the credit.
- Pure maple syrup or honey (1/4 cup): Just enough sweetness to make these feel special without turning them into dessert bars.
- Unsweetened almond milk (1/4 cup): A light binder that lets the oats soak up all the goodness without making the bars dense.
- Egg or flax egg (1 large): The glue that holds everything together, though the flax option works beautifully if you're keeping things plant-based.
- Pure vanilla extract (1 tsp): A tiny amount that rounds out the flavor profile and makes people ask what your secret is.
- Old-fashioned rolled oats (2 cups): Use the chunky kind, not instant—texture matters and makes these feel hearty instead of mushy.
- Vanilla or chocolate protein powder (1/2 cup): This transforms the bars from a snack into actual fuel; chocolate amplifies the monkey vibe while vanilla plays nice with everything.
- Chopped walnuts (1/2 cup): Brings nutty depth and that satisfying crunch you need, though pecans work if that's what you have on hand.
- Dark chocolate chips (1/3 cup): Non-negotiable for the Chunky Monkey experience, and dark chocolate means you're not adding unnecessary sweetness.
- Unsweetened shredded coconut (1/4 cup, optional): I skip this most days, but sometimes add it for texture when I want something that feels beachy and different.
- Ground cinnamon (1/2 tsp): A warm whisper that enhances banana without stealing the show.
- Fine sea salt (1/4 tsp): Trust this—it amplifies every flavor and prevents the bars from tasting one-note.
- Baking powder (1 tsp): Gives the bars a tender crumb so they're not brick-like, which was my first failed attempt mistake.
Tired of Takeout? 🥡
Get 10 meals you can make faster than delivery arrives. Seriously.
One email. No spam. Unsubscribe anytime.
Instructions
- Heat your oven and prep the pan:
- Set the oven to 350°F and line an 8x8-inch pan with parchment paper, letting it hang over the edges so you can lift the whole thing out later. This step saves you from the heartbreak of trying to pry bars out with a spatula.
- Combine your wet ingredients:
- Mash those bananas until they're almost liquid—you want no lumps here—then whisk in the applesauce, maple syrup, almond milk, egg, and vanilla until the mixture looks smooth and unified. The banana should be thick enough that everything clings together rather than pooling at the bottom.
- Mix the dry ingredients separately:
- In another bowl, stir together the oats, protein powder, walnuts, chocolate chips, coconut if you're using it, cinnamon, salt, and baking powder until evenly distributed. This prevents the protein powder from clumping when it hits the wet mixture.
- Bring it all together gently:
- Pour the wet ingredients into the dry and stir just until combined—overmixing is the enemy here and leads to dense, tough bars instead of the tender ones you're after. You should see ribbons of batter, not a perfectly smooth mixture.
- Transfer and top:
- Spread the batter evenly into your prepared pan, then scatter extra chocolate chips and walnuts on top if you're feeling generous. This is where they start looking bakery-worthy and you know you've made the right choice.
- Bake until golden:
- Bake for 25 to 28 minutes until the top is golden and a toothpick poked into the center comes out mostly clean with just a few moist crumbs clinging to it. The centers will continue setting as they cool, so don't overbake or you'll end up with hockey pucks.
- Cool and slice:
- Let them cool completely in the pan—this is non-negotiable because warm bars will fall apart on you. Once cooled, lift everything out using those parchment paper edges and slice into 12 bars with a sharp knife dipped in hot water between cuts.
 Pin
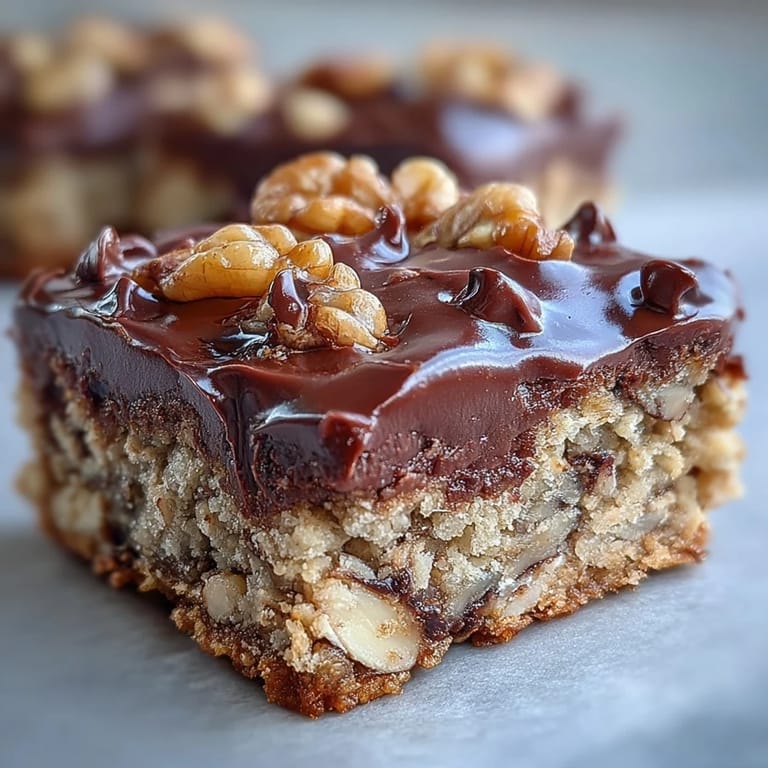
Pin My coworker Marcus keeps a bar in his desk drawer and eats it at 3 p.m. when he hits the afternoon slump, and he swears it's the only thing that gets him through meetings without getting cranky. There's something powerful about food that genuinely nourishes you instead of just filling the void.
Storage and Make-Ahead Magic
These bars are the definition of a meal-prep hero because they taste just as good on day three as they do fresh from the oven. I keep them in an airtight container at room temperature, and they'll hang out there happily for three days without going stale or weird. For anything longer, slide them into the fridge where they'll last a full week, or freeze them for whenever you need a backup breakfast plan.
Flavor Customization and Swaps
The beauty of these bars is that they're flexible without falling apart—I've swapped walnuts for pecans when that's what I had, and honestly, almonds work great too if you prefer a more delicate crunch. Chocolate chips can be semi-sweet if you want them sweeter, or you could go with white chocolate for a totally different vibe. The protein powder is the only ingredient I wouldn't mess with too much since it's doing real structural work, but vanilla and chocolate are both fantastic depending on what you're craving.
Pairing and Serving Ideas
I've learned these bars stand alone beautifully for a grab-and-go situation, but they're even better when you pair them with something—my go-to is strong black coffee that cuts through the sweetness and makes the whole experience feel intentional instead of rushed. Cold almond milk, Greek yogurt, or even a simple green tea all complement the banana-chocolate-nutty combo in different ways.
- Dunk them briefly in your coffee like biscotti if you want them extra soft and indulgent.
- Crumble one over yogurt with granola for a deconstructed breakfast bowl that feels fancy.
- Keep one in your gym bag as the perfect post-workout refuel because the protein and carbs actually do the job they're supposed to do.
 Pin
Pin These bars have become my non-negotiable Sunday ritual, the thing I make when I want to start the week feeling capable and fed. There's real satisfaction in knowing exactly what's in your breakfast and that it's actually going to keep you going.
Recipe Q&A
- → Can I make these oat bars vegan?
Absolutely. Replace the egg with a flax egg by mixing 1 tablespoon ground flaxseed with 2.5 tablespoons water. Let it sit for 5 minutes until thickened, then use it exactly as you would the egg in the instructions.
- → What type of protein powder works best?
Vanilla or chocolate protein powder both work wonderfully here. Whey, casein, or plant-based proteins are all suitable. Just be aware that different brands may absorb moisture differently—you might need to add an extra splash of almond milk if the batter seems too thick.
- → How should I store these bars?
Keep them in an airtight container at room temperature for up to 3 days. For longer storage, refrigerate for up to 1 week. You can also freeze individually wrapped bars for up to 3 months—just thaw at room temperature or microwave for 20-30 seconds.
- → Can I substitute the nuts?
Pecans or almonds make excellent replacements for walnuts. If you need these to be nut-free, try pumpkin seeds or sunflower seeds instead. Just keep the total quantity the same for the best texture and protein content.
- → How do I know when the bars are done baking?
The edges should be lightly golden and the center set when gently touched. A toothpick inserted in the middle should come out mostly clean—moist crumbs are fine, but wet batter means they need more time. Let them cool completely before slicing to prevent crumbling.
- → Can I reduce the sugar content?
These bars rely on naturally sweet ripe bananas, with maple syrup as the only added sweetener. You can reduce the maple syrup to 2 tablespoons if you prefer less sweetness, though the bars may be slightly less moist.